Handmade Chain Drive Differential build project started when I needed a strong and compact drivetrain system for my mini buggy. To build this setup, I only used the differential carrier assembly and axle shafts from a normal vehicle differential, while all the other parts were handmade and modified by me.
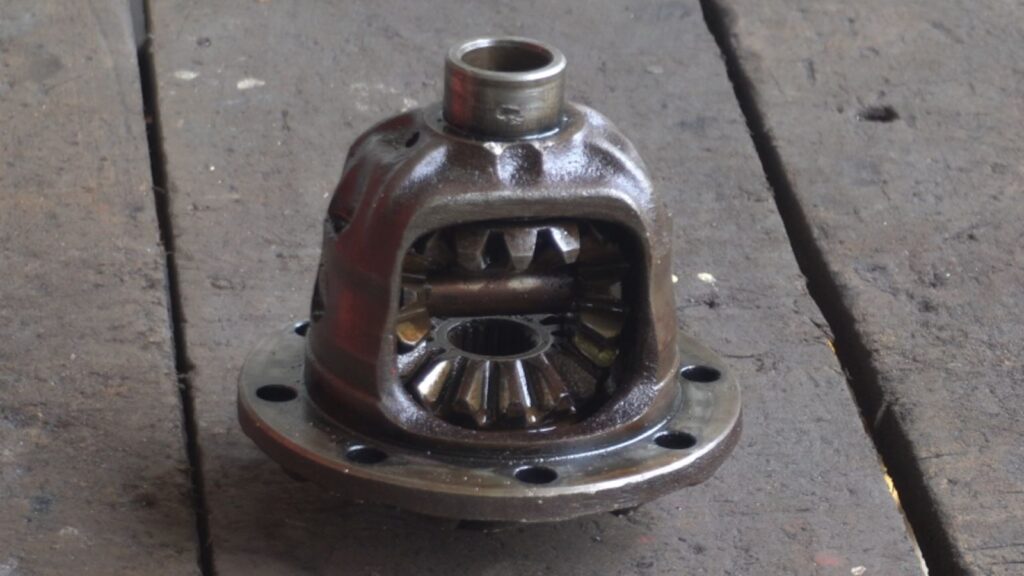
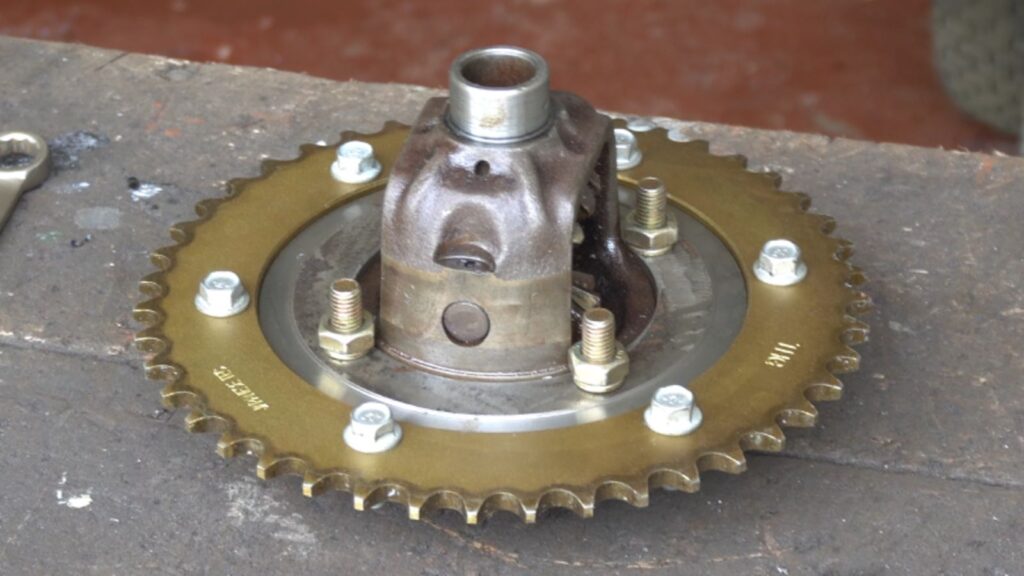
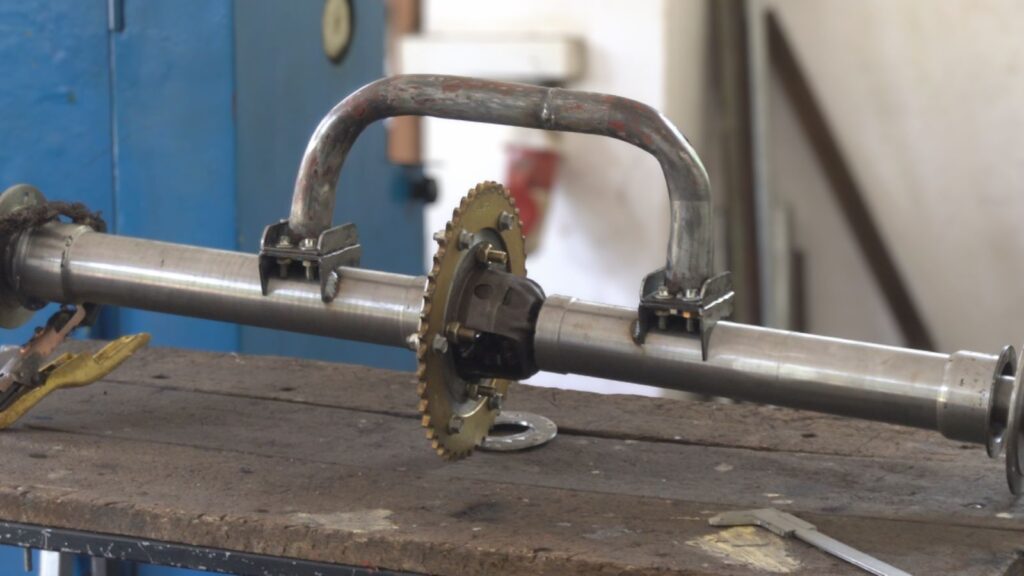
Because this mini buggy uses a motorcycle engine, a standard car differential cannot be used directly. A normal differential is designed for a driveshaft system, not a chain drive setup. To solve this problem, I removed the original crown wheel from the differential carrier assembly and replaced it with a motorcycle sprocket shaft.
For this build, I used a 520-44T sprocket shaft.
The sprocket shaft could not be mounted directly to the differential carrier assembly. So, I machined a custom steel adapter ring using a lathe machine. This adapter was designed to fit both the differential carrier assembly and the sprocket shaft perfectly.
After machining, the sprocket shaft and differential carrier assembly were securely connected using bolts.
Inside the differential carrier assembly, the four internal gears must be properly greased for smooth operation and long life. It is also important to cover the assembly to protect it from mud, dust, and water during off-road use.
Handmade Chain Drive Differential Axle Housing Tube Build
To build the axle housing tubes, I used 2.5-inch steel tubes. Two axle housing tubes are required for the differential setup.
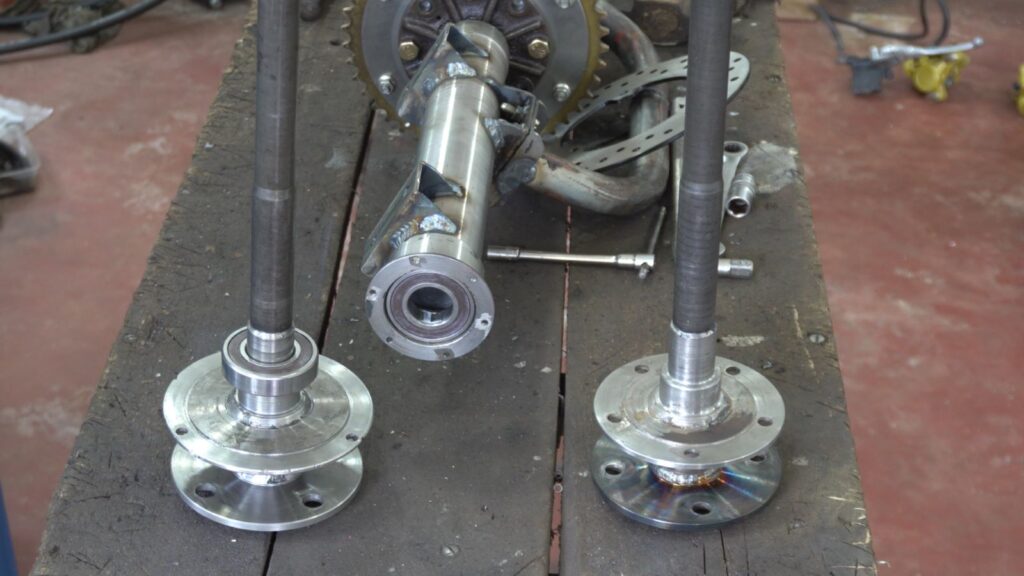
Because bearings are mounted on both ends of the tubes, shaft pieces were welded to both sides and machined on a lathe to match the correct bearing sizes.
On the side connected to the differential carrier assembly, I used a 6006-2RS bearing. On the outer side, I also used a 6206-2RS bearing together with a 62-40-10 dust seal.
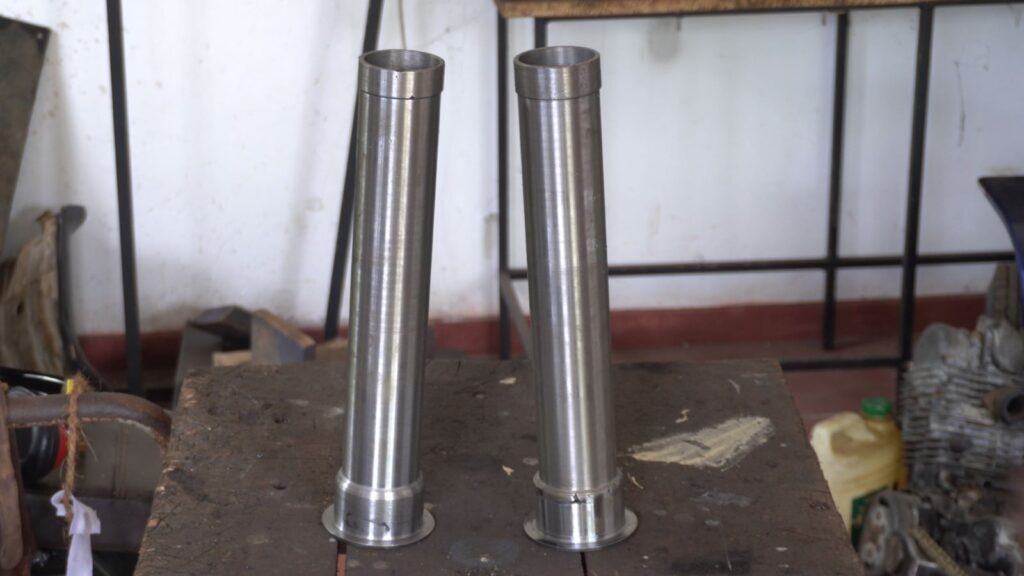
To prevent the bearing and dust seal from moving outward, I built a custom N-cap. This part can be clearly seen in the video.
Each axle housing tube is 37 cm long, and both tubes are exactly the same size.
After installing the bearings, both axle housing tubes were mounted to the differential carrier assembly.
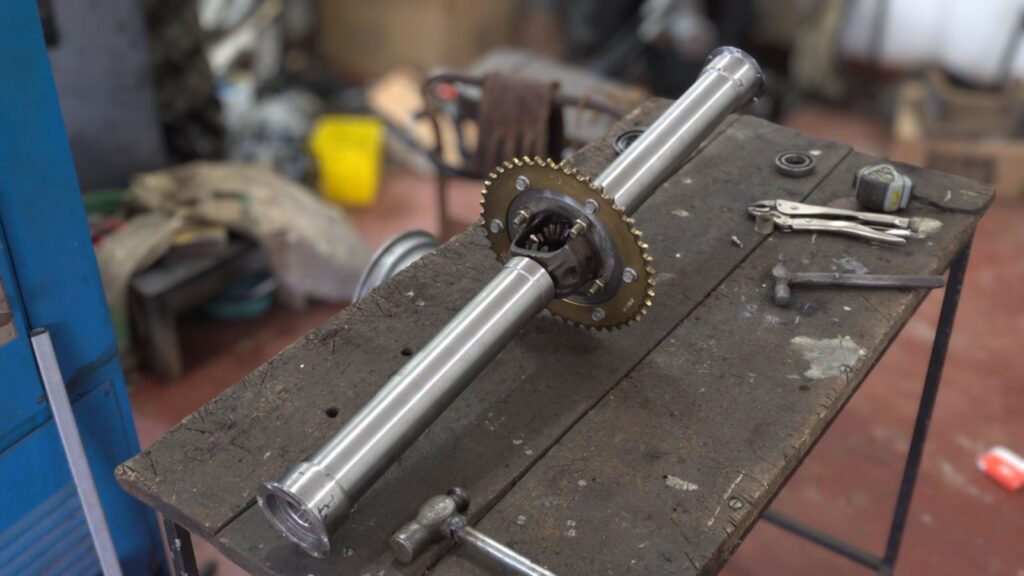
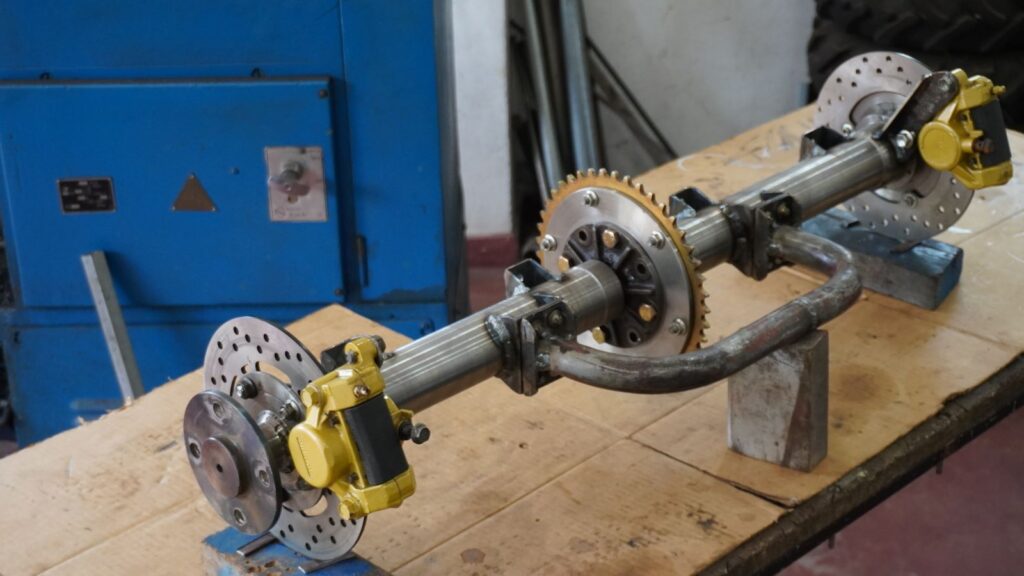
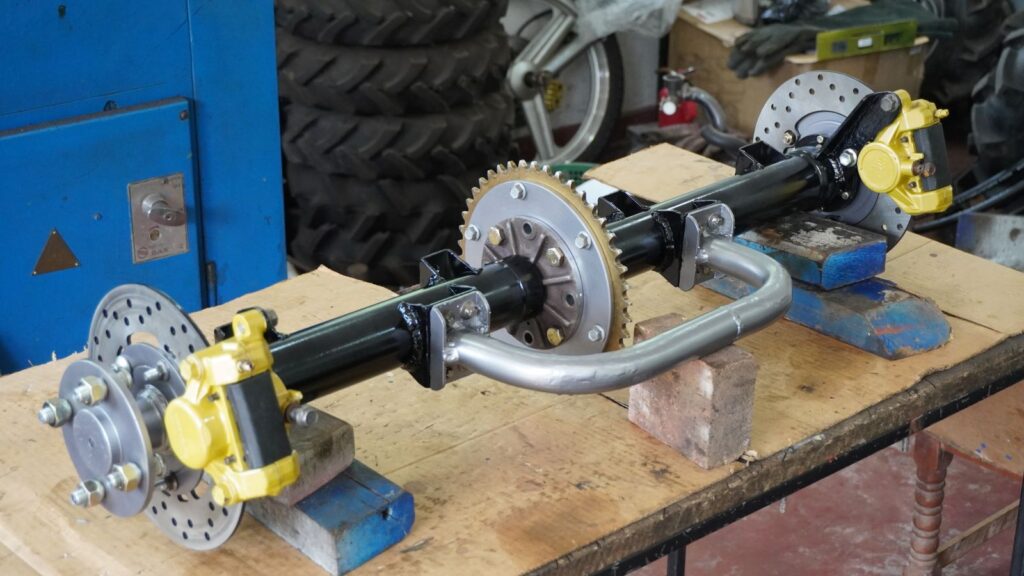
To increase the strength of the entire differential system, I added an extra tube bar connected using bolts. This tube bar also includes four brackets used to mount the differential onto the vehicle chassis.
Once installed on the buggy chassis, the entire differential assembly becomes much stronger and more stable.
This Handmade Chain Drive Differential setup was designed to handle off-road conditions while keeping the drivetrain compact and strong.
Handmade Chain Drive Differential Axle Fabrication
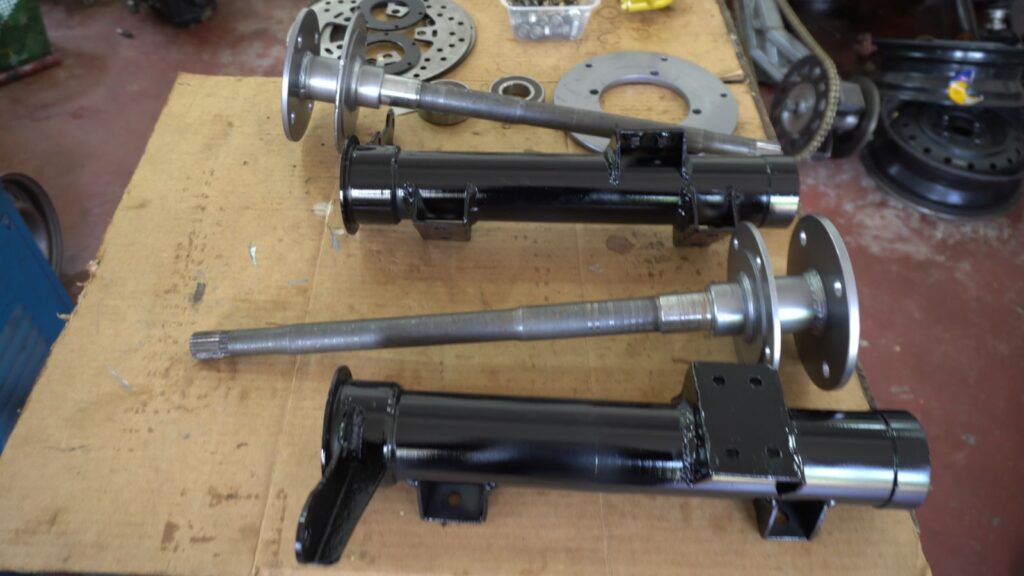
Both axle shafts were taken from the original differential assembly. The extra long sections were cut off from both sides.
To mount the rims, steel rings were welded onto the axles and machined on a lathe to the correct dimensions.
Then, another steel ring was welded 4.5 cm inward from the rim mounting area. This section was machined to mount the brake discs.
Both axle shafts are 47 cm long and equal in size.
For the braking system, I used motorcycle brake discs and motorcycle brake calipers.
This custom differential setup can be used with 12-inch, 13-inch, or 14-inch rims. The complete width of the differential assembly is 100 cm. This size provides good stability for mini buggy and mini lorry projects while keeping the overall setup compact and strong.
Handmade Chain Drive Differential Final Assembly and Painting
After completing the entire build, all the parts were disassembled again for painting and finishing work.
Once painting was completed, all the parts were reassembled carefully. The final result is a strong and compact handmade chain drive differential system suitable for mini buggy or mini lorry projects.
This Handmade Chain Drive Differential is simple, durable, and designed specifically for motorcycle engine-powered off-road vehicles and mini buggy projects.
You can also check my Handmade 2WD drive motorcycle project for another custom drivetrain setup.
The video below clearly shows the complete handmade chain drive differential build process, including the fabrication work, axle housing setup, sprocket mounting system, and the final assembled differential ready for the mini buggy project.